python实现灰度图像拉伸
1、灰度拉伸是一种简单的线性运算。经过变换后使得灰度布满整个灰度等级范围。
为了把不同图像的灰度值映射到0-255范围内,常见的方法有:
2、处理过程如下:
import cv2 as cv
import numpy as np
from matplotlib import pyplot as plt
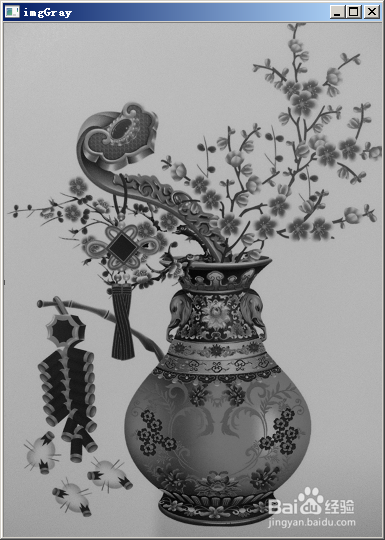
image = cv.imread('c:\\meiping1.png')
imgGray = cv.cvtColor(image, cv.COLOR_RGB2GRAY)
cv.imshow('imgGray', imgGray)

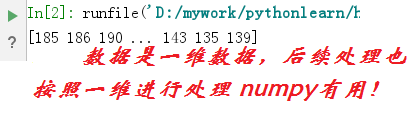
3、rows, cols = imgGray.shape
reshapeGray = imgGray.reshape(rows * cols)
print(reshapeGray)
reshapeGrayList = reshapeGray.tolist()
通过.tolist() 转换成列表 方便后面求最大灰度 和最小灰度
4、A = min(reshapeGrayList)
B = max(reshapeGrayList)
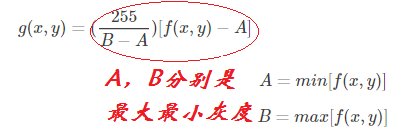
1)方法一
Gxy = (255 / (B - A)) * abs(imgGray - A)
print('A = %d,B = %d' % (A, B))

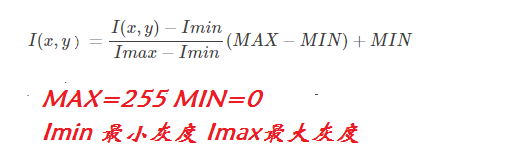
5、2)另一种方法
MAX = 255
MIN = 0
Gxy = (imgGray - A) / (B - A) * (MAX - MIN) + MIN
区别在gxy 其他不变!

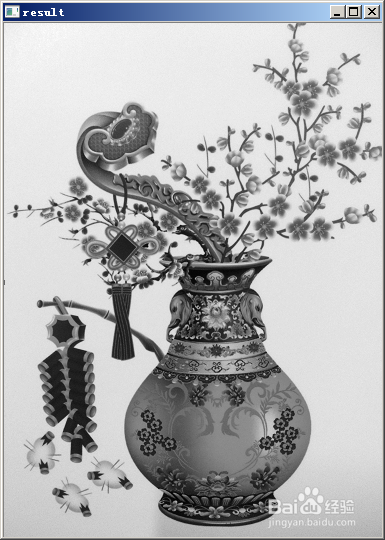
6、result = np.uint8(Gxy )
cv.imshow('imgGray', imgGray)
print(imgGray)
cv.imshow('result', result)
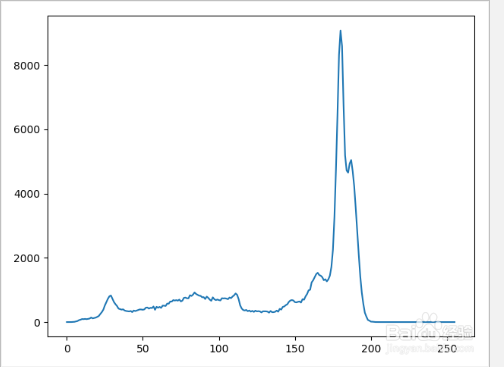
hist = cv.calcHist([imgGray],
[0], None, [256], [0.0,255.0])
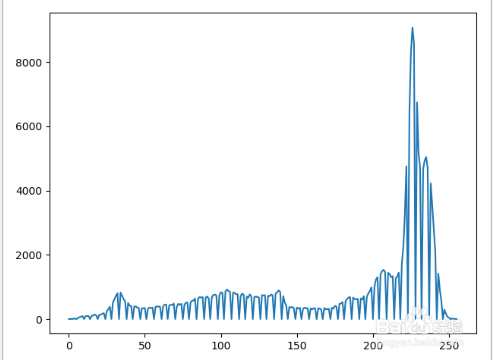
hist1 = cv.calcHist([result],
[0], None, [256], [0.0,255.0])
plt.plot(hist)
plt.show()
plt.plot(hist1)
plt.show()
cv.waitKey()
cv.destroyAllWindows()
7、小结:
1)2种方法原始图和结果图对比基本亮度或者对比度提高了。图片更便于辨识度提高。
2)直方图也类似的。
3)灰度转一维列表 tolist()